Step 3. Create a CloudFront Distribution
3. Create distribution manually
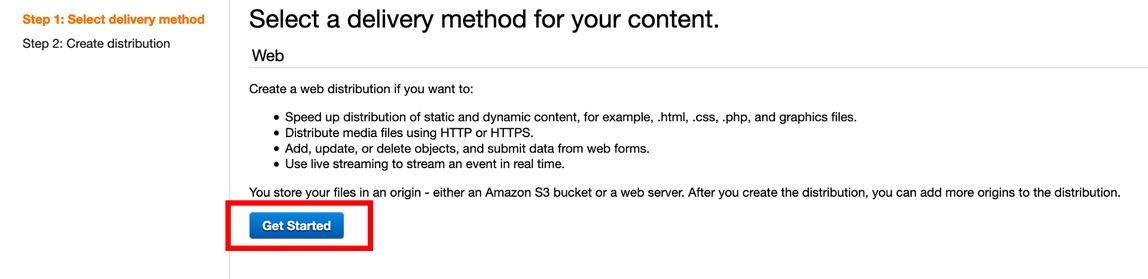
- Visit CloudFront console, and click Create distributions, choose Web for delivery method
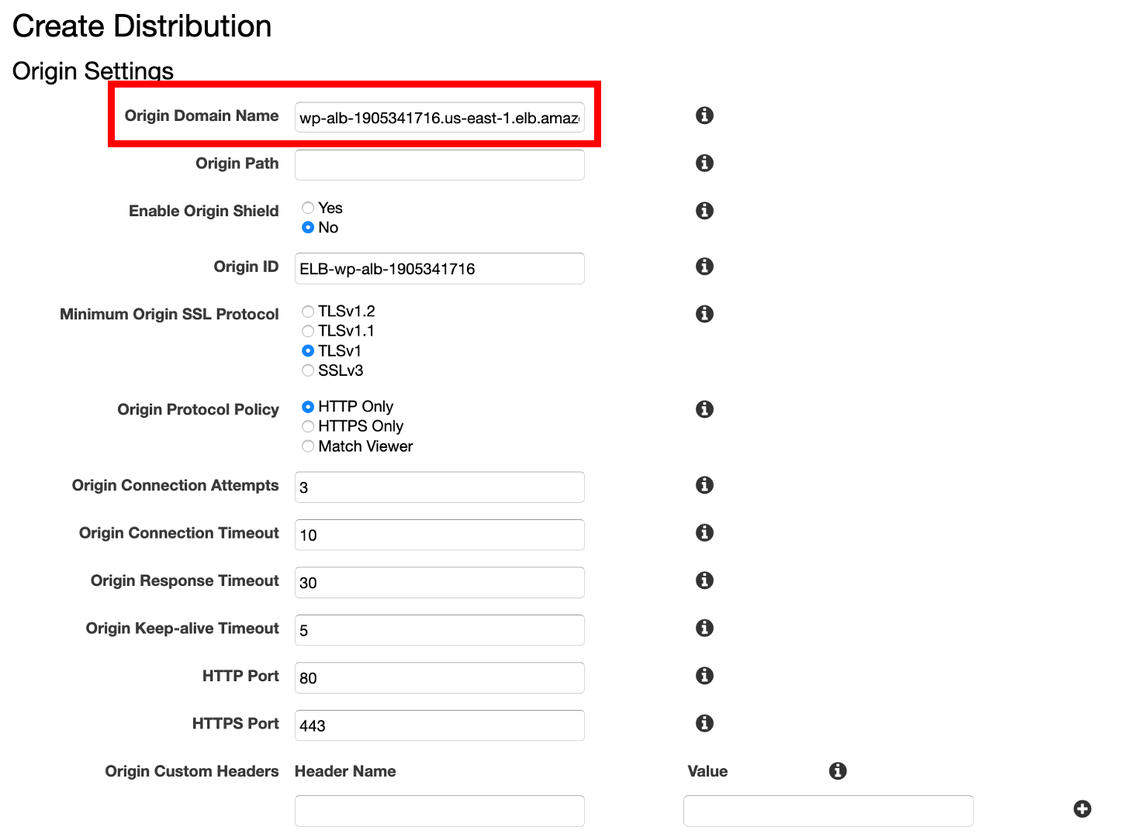
- For Origin Domain Name, select wordpress-alb
- In Default Cache Behavior Settings
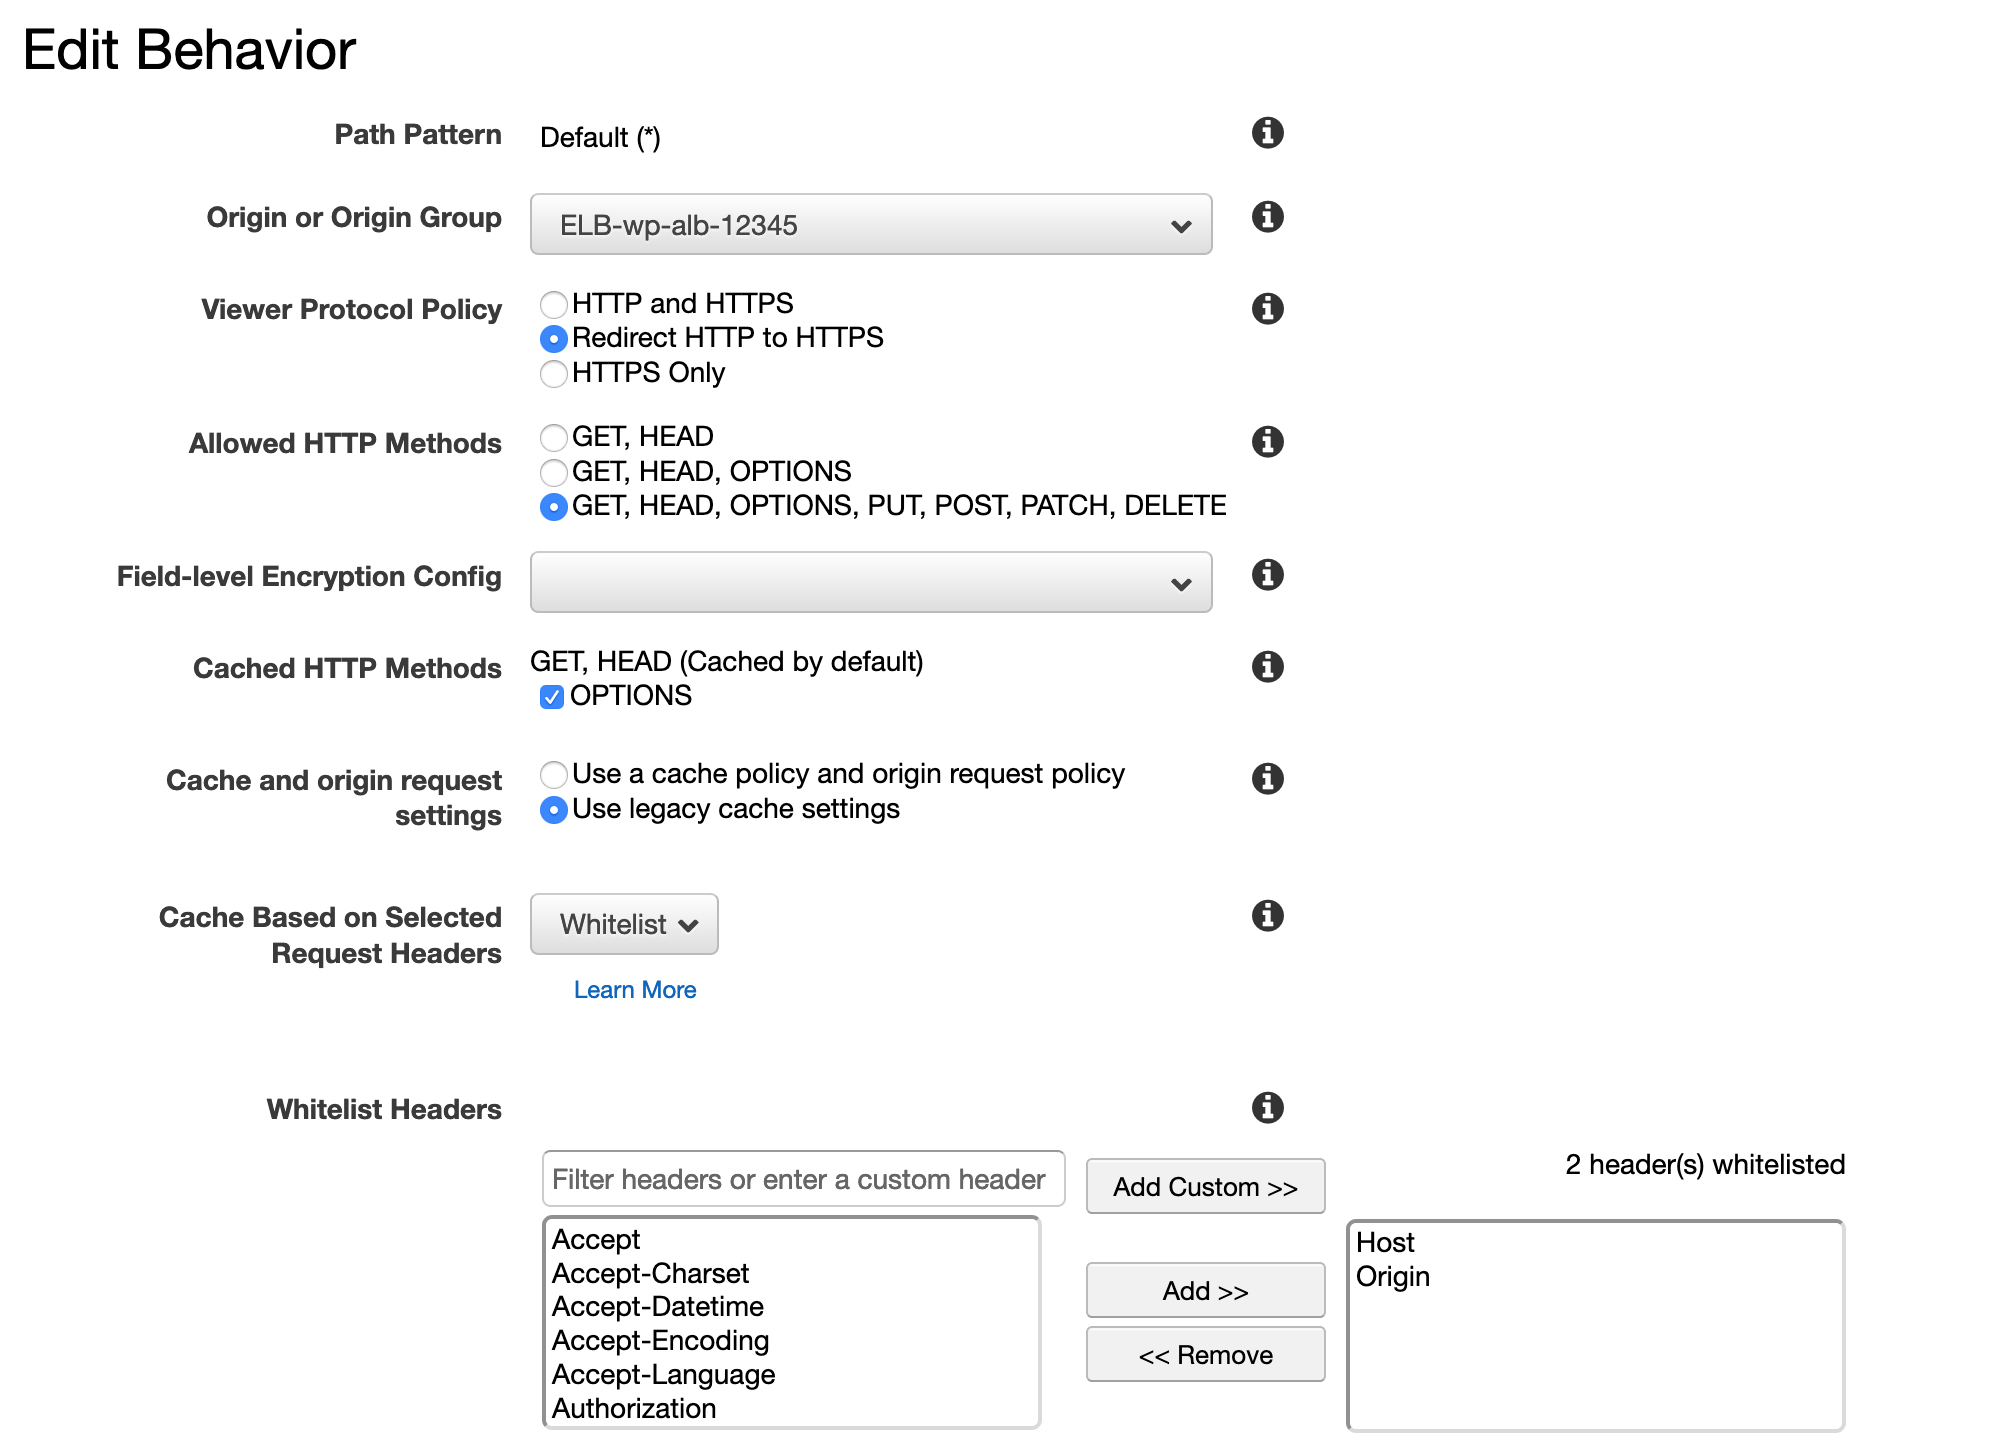
- For Origin Protocol Policy, select ** Redirect HTTP to HTTPS**
- For Allowed HTTP Methods, select GET, HEAD, OPTIONS, PUT, POST, PATCH, DELETE
- For Cached HTTP Methods, select GET, HEAD, OPTIONS
- For Cache and origin request settings, select Use legacy cache settings
- For Cache Based on Selected Request Headers, select Whitelist
- For Whitelist Headers, search and add Host and Origin
-
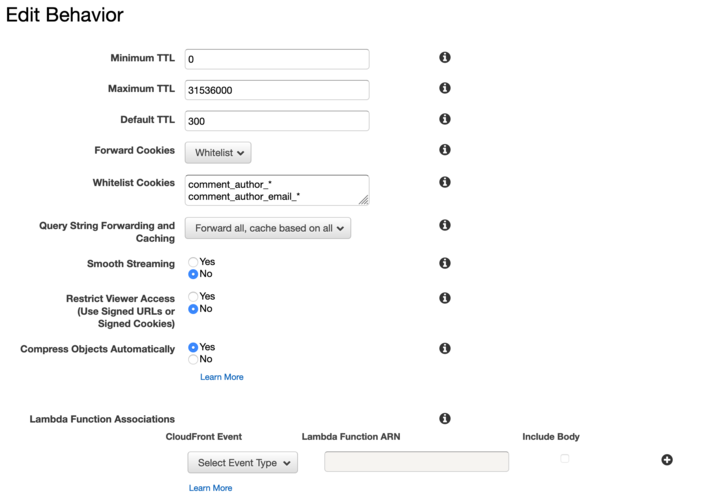
For Object Caching, select Customize
-
For Minimum TTL, enter
0 -
For Maximum TTL, enter
31536000 -
For Default TTL, enter
300 -
For Forward Cookies, select comment_author_, comment_author_email_, comment_author_url_, wordpress_, wordpress_logged_in, wordpress_test_cookie, wp-setting-
-
For Query String Forwarding and Caching, select Forward all, cache based on all
-
For Smooth Streaming, select No
-
For Restrict Viewer Access, select No
-
For Compress Objects Automatically, select Yes
-
Finally, Create Distribution
- Visit CloudFront Distribution page
- Click the distribution ID created in last step
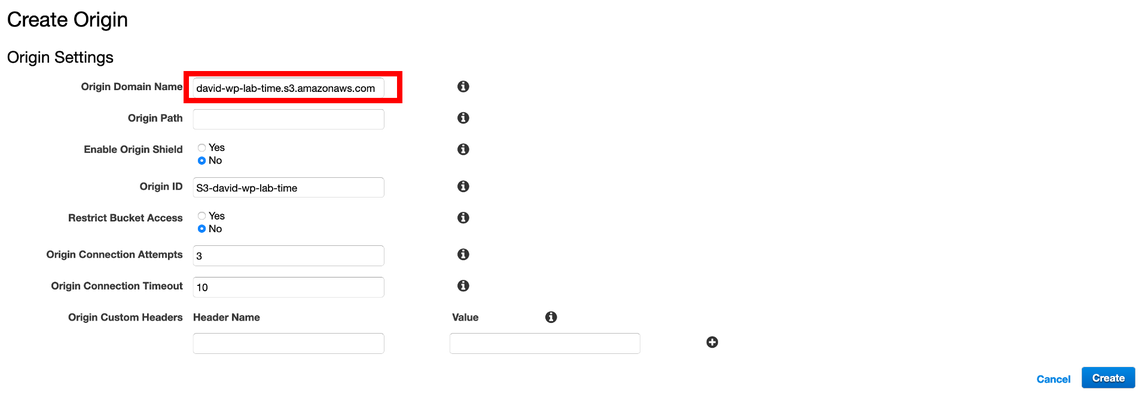
- Click **Origins and Origin Groups **tab, and click Create Origin
- For Origin Domain Name, select S3 bucket created in Lab 1 and Click Create
- Next, move to Behavior in your Distribution and click Create Behavior, follow the table below to create 4 new behaviors:

More details about CloudFront settings can be found in this blogpost