Step 1. Create an Application Load Balancer
- Connect to your WordPress instance created in Lab1
- Move into WordPress folder and edit the wp-config.php file
cd /var/www/html/
nano wp-config.php
- Add the following codes in the new line for upcoming steps
$_SERVER['HTTPS'] = 'on';
-
Use CTRL + O to save file, CTRL + X to quit nano editor
-
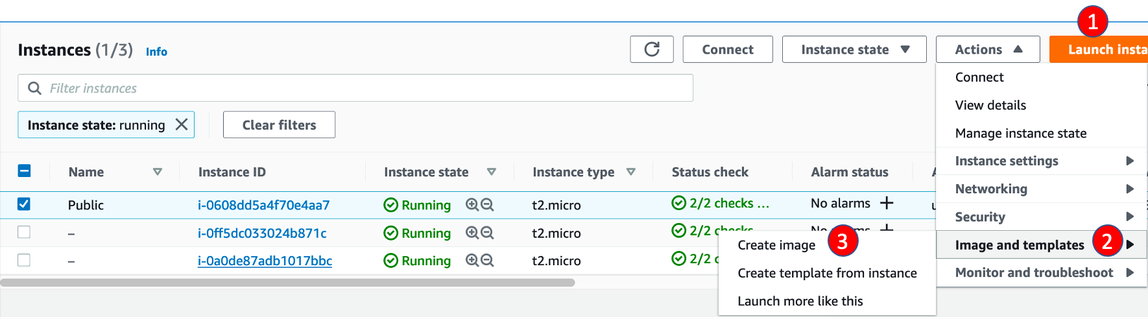
Visit EC2 instance page, select the public WordPress instance created in Lab1
-
Click Actions → Image and templates → Create image
-
Enter the Image name and click Create image
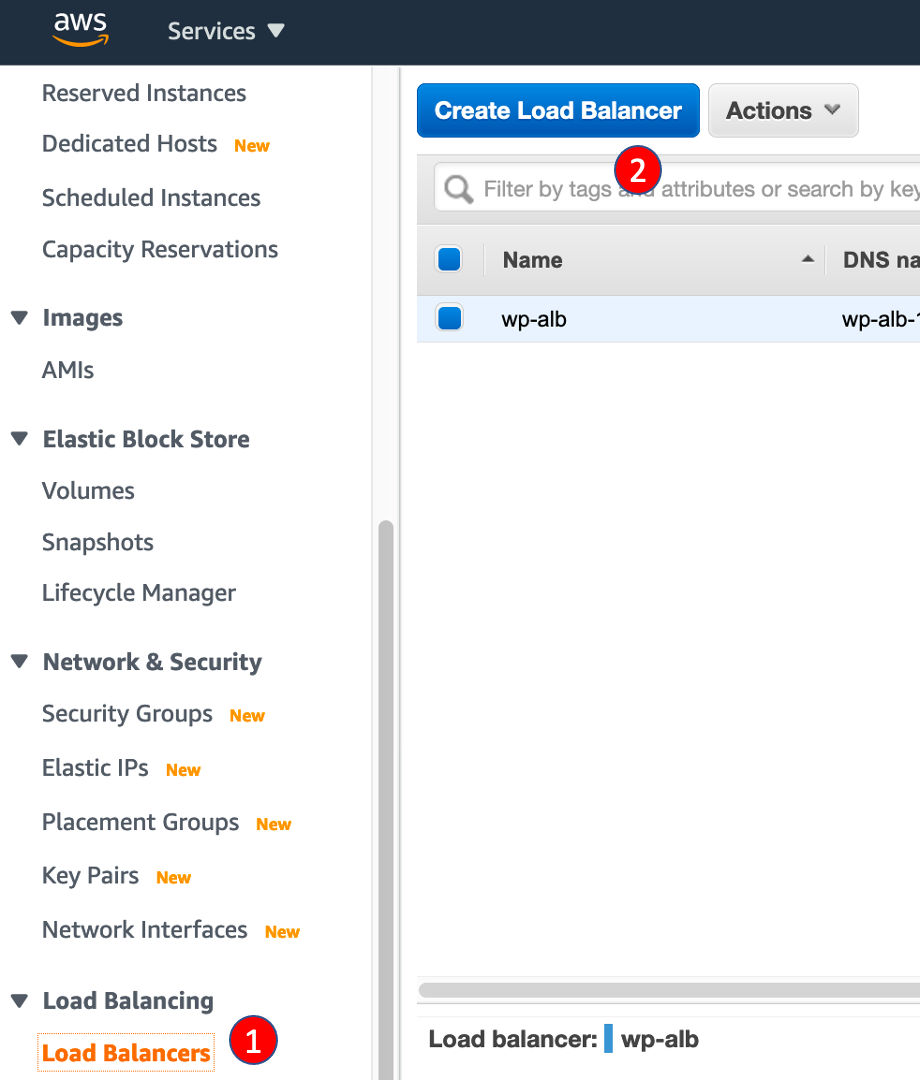
- Visit EC2/Load Balancing/Load Balancers
- Click Create Load Balancer
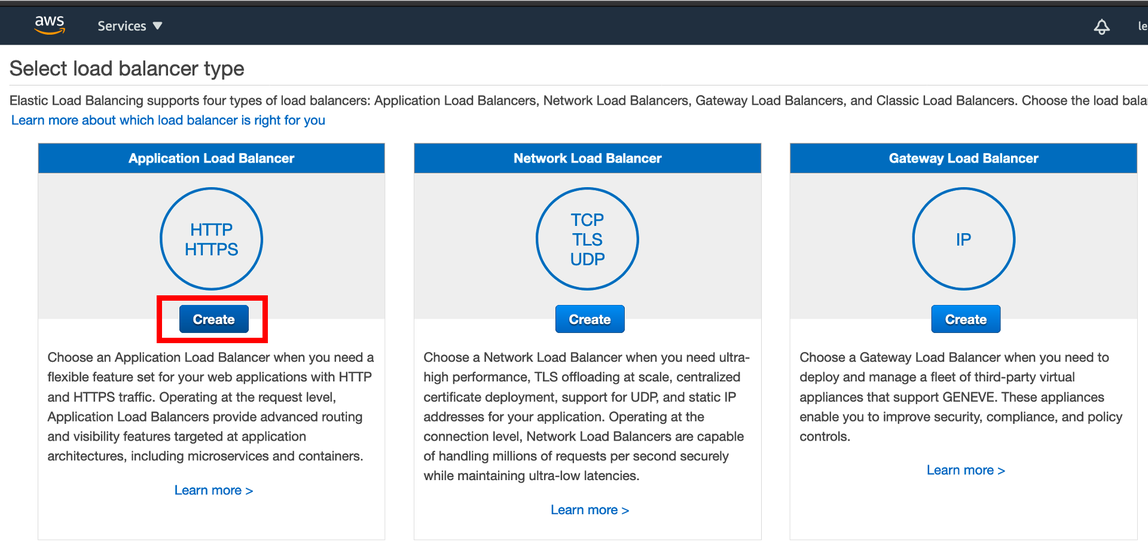
- In Step 1: Select load balancer type, find Application Load Balancer and click Create
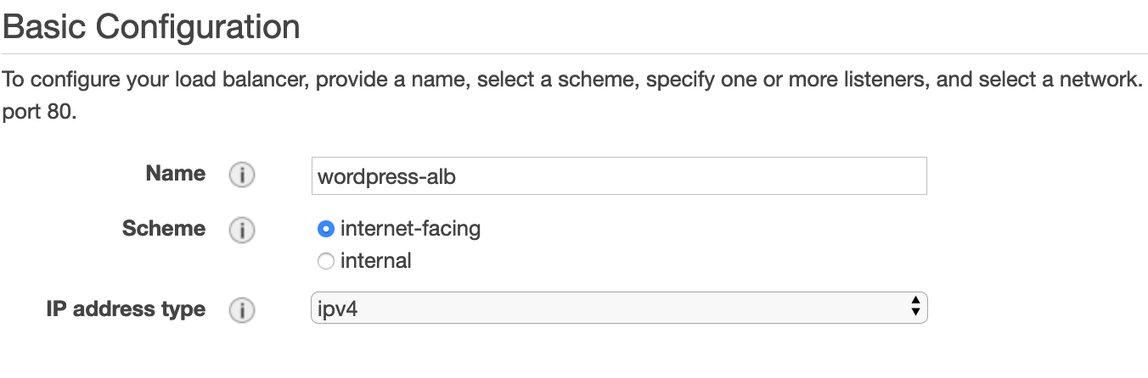
- In Basic Configuration section, enter the name
wordpress-alb - In Availability Zones, for VPC, choose Vpc / vpc-stack created by CloudFormation
- For Availability Zones, select us-east-1a/PublicSubnet0 and us-east-1b/PublicSubnet1
- In Step 2: Configure Security Settings, click Next
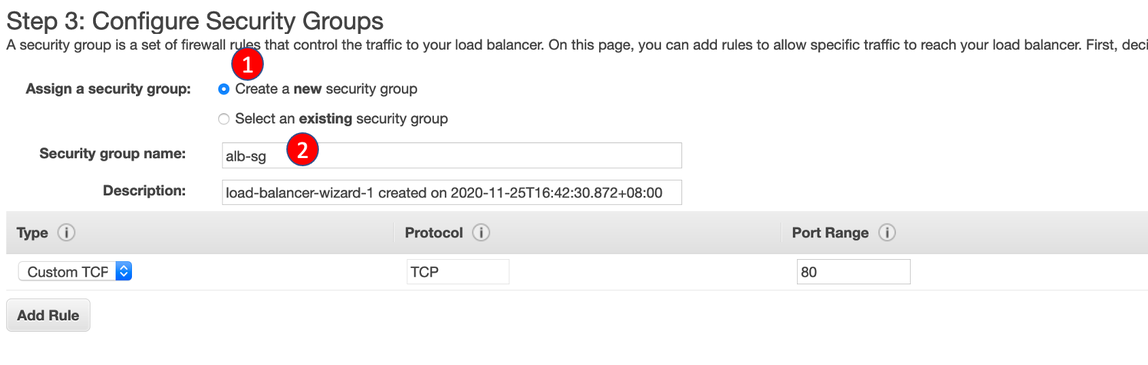
- In Step 3: Configure Security Groups, for Assign a security group, choose Create a new security group
- For Security group name, enter
alb-sg - For VPC, choose Vpc / vpc-stack
- Click Add rule in Inbound rules section.
- For Type, select HTTP
- For Source, select Anywhere-IPv4 and click Create security group
- In Step 4: Configure Routing
- For Target Group, select New target group
- For Name, enter
wordpress-tg - For Target type, select Instance and click Next: Register Targets
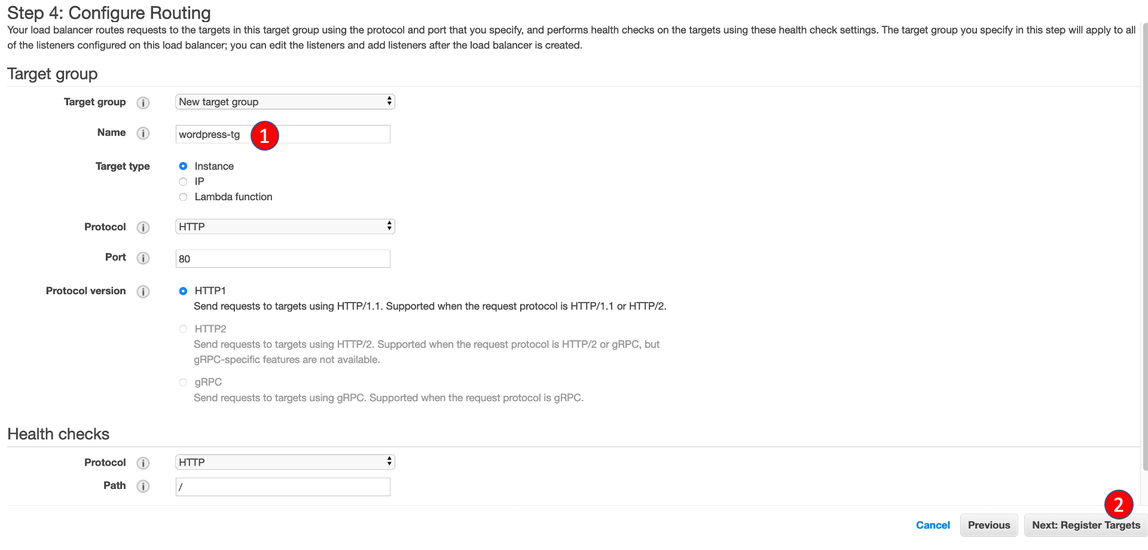
- In Register Targets stage, click Next: Review
- In Review stage, click Create