Step 6. Visit your website and configure the WordPress setting
In this section, we will complete the Wordpress installation and install a plugin through which we can access files on Amazon S3. This will improve performance and reduce load on our small web server as static files (such as images) are served via the S3, rather than via the web server.
First of all, we’ll create a new user in AWS that the Wordpress plugin will use for Amazon S3.
- Open the IAM console.
- Click Users on the left menu, then click Add users .

- For User name, enter
Wordpress. - Click Next.
- Select the Attach policies directly box on top of the next page.
- Search for
CloudFrontFullAccessand select it. - Do the same for
AmazonS3FullAccess. - Click Next → Create user.
- Go into created user.
- Click Security credentials tab.
- Go to the Access keys section.
- Click Create access key.
- Select Application running on an AWS compute service.
- Click checkbox I understand the above recommendation and want to proceed to create an access key.
- Click Next → Create.
- Click Download .csv to store your Access/Secret key. These are the access credentials that the plugin will use to programmatically access Amazon S3.
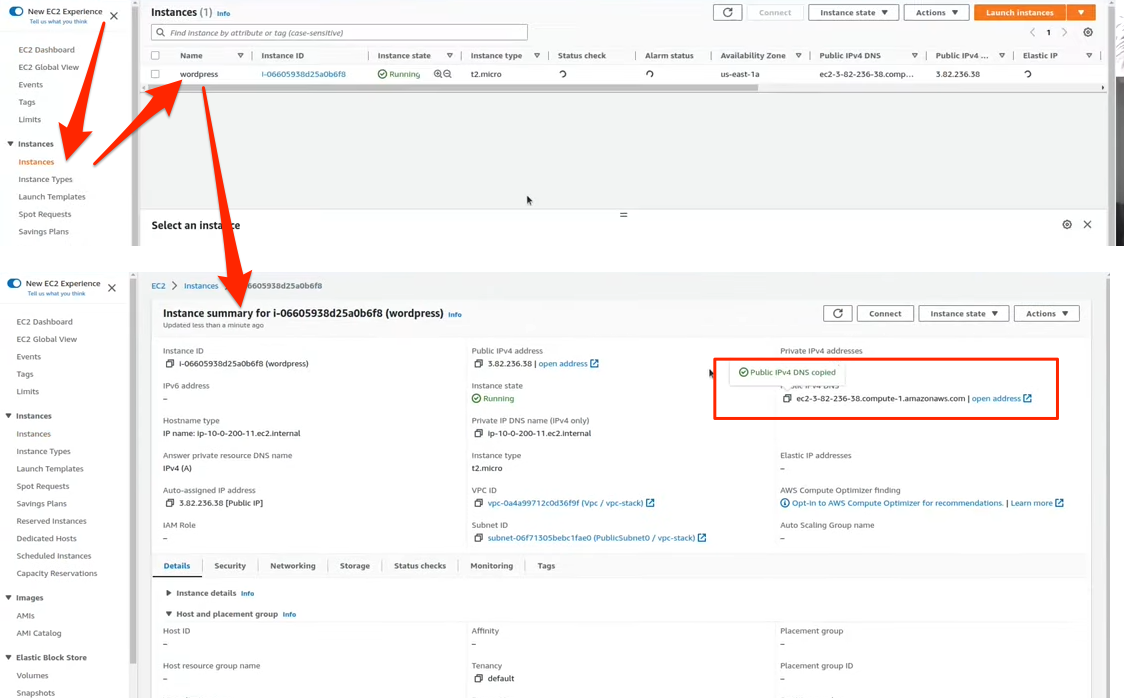
Now that the user was created, let’s access the Wordpress instance via the EC2 instance’s public address.
- Open another tab/window and visit the EC2 console
- Select the EC2 instance with name wordpress, and look for the Public IPv4 DNS field in the Details tab that opens below. Copy it via the icon on the left, then paste it in your browser. You should see the setup page of WordPress.
- On the setup page, choose something for Site Title, Username, Password (be sure to remember it!) and Your Email, then click Install WordPress
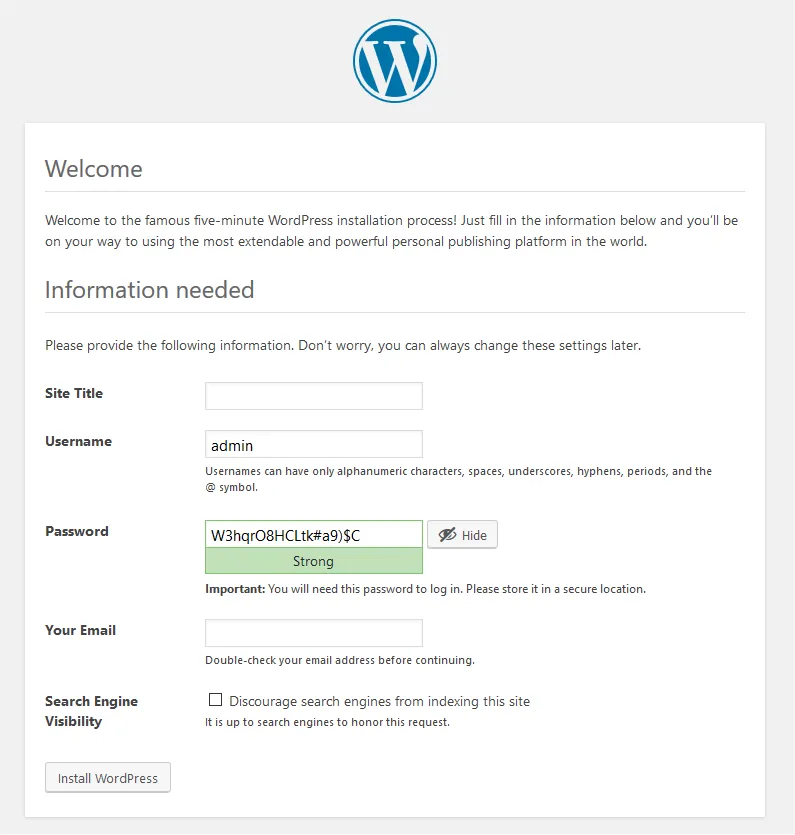
- After few seconds, you will see a Success! message. Click Log in to proceed.
- Enter your username and password, and click Login button, you will see the Wordpress Dashboard.
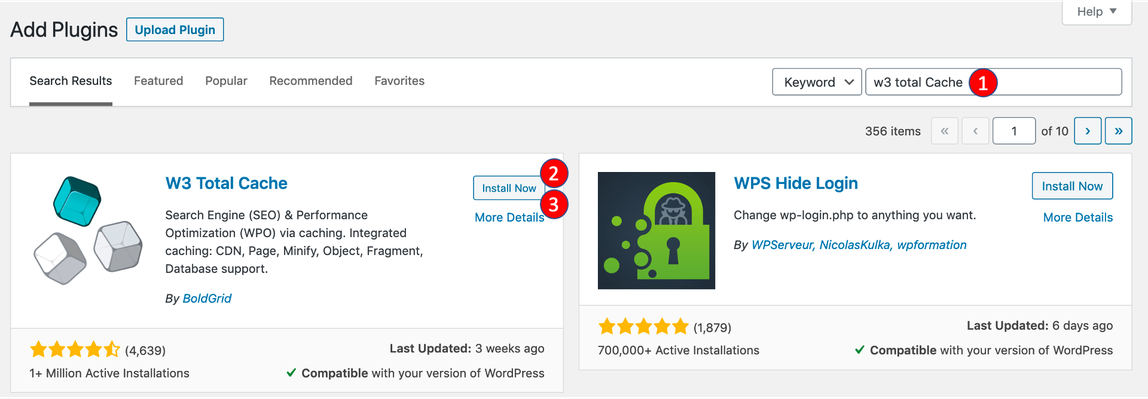
- In the menu on the left, click Plugins.
- Click Add New, search
w3 total cacheand click Install Now, then Activate. - In the menu on the left, click Performance > General setting.
- If prompted for collecting usage data, click the Skip button.
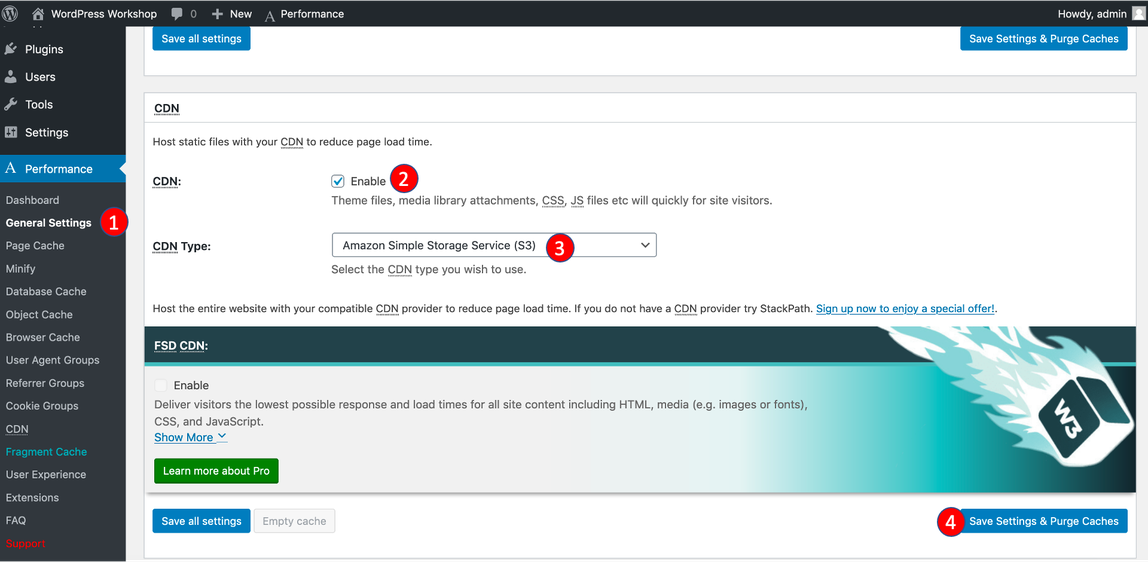
- On top of the page, click CDN.
- Check Enable the box and for CDN type, select Amazon Simple Storage Service (S3) (in the Origin Push section).
- Click Save all Settings.
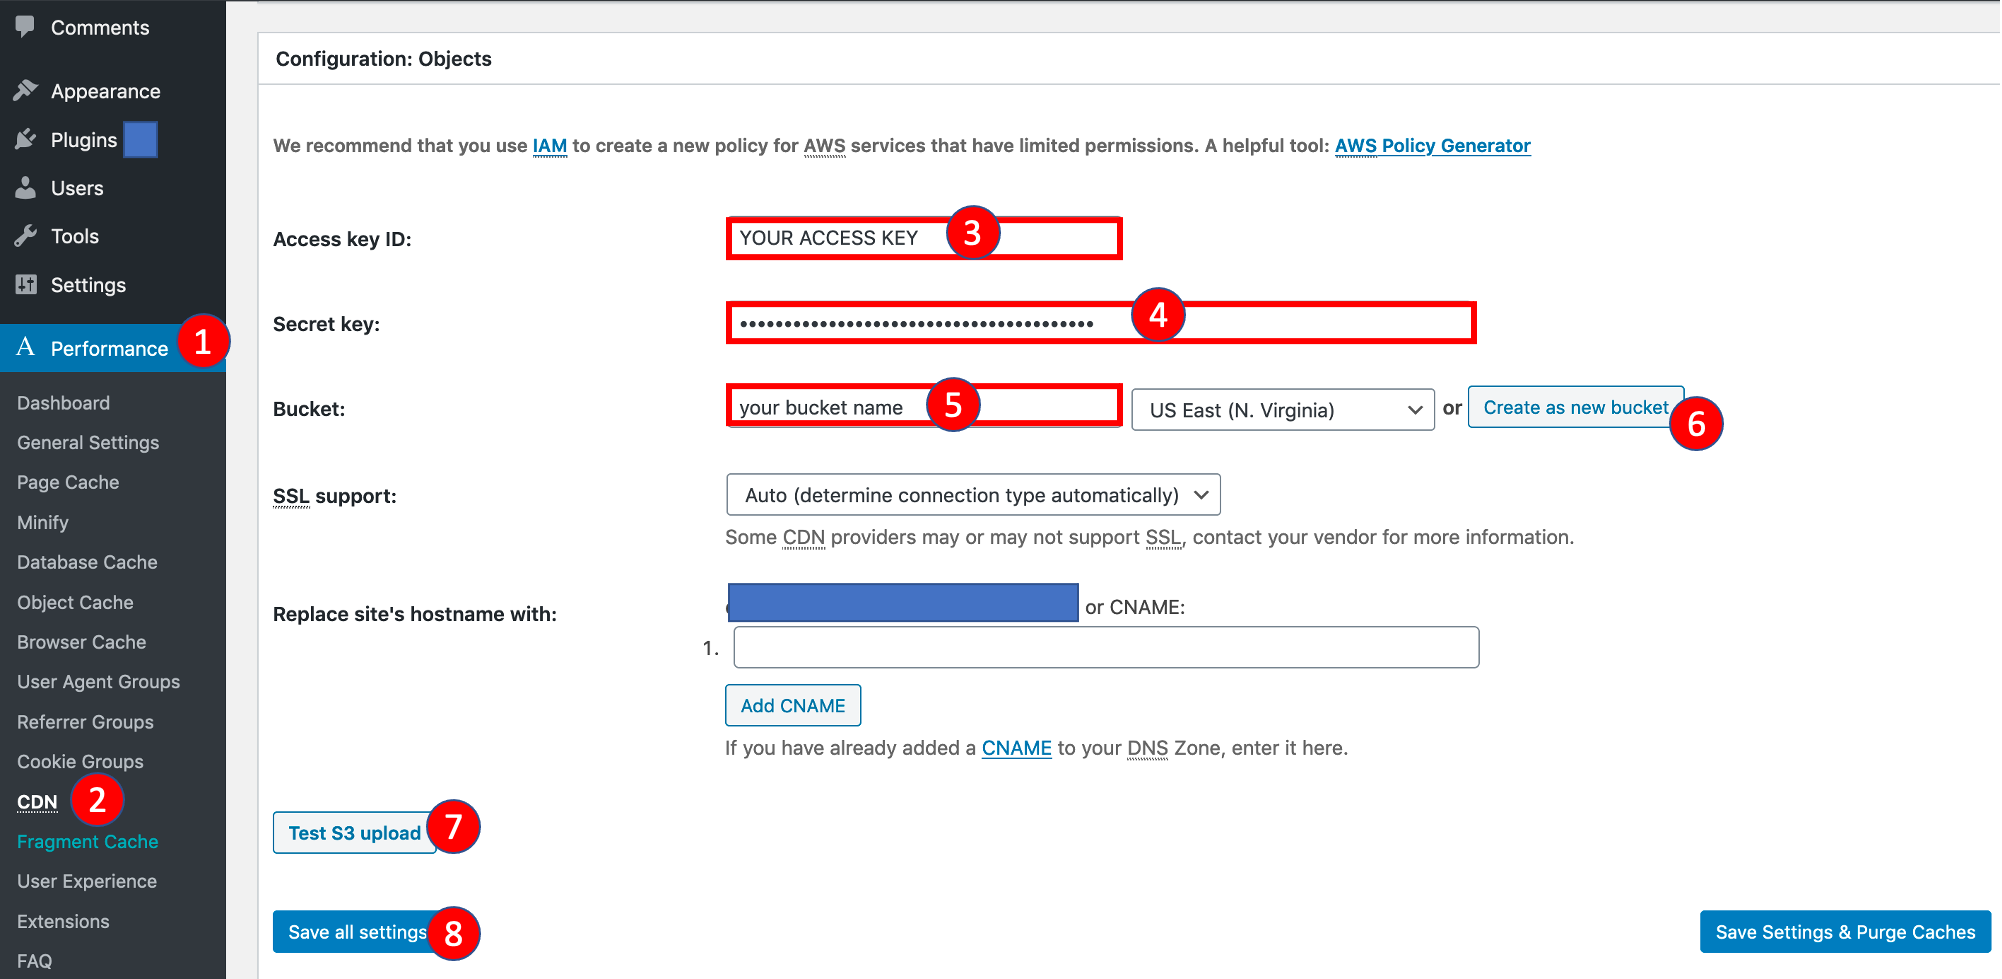
- Click Performance > CDN in the menu on the left, then scroll down Configuration: Objects.
- Copy and paste the Access key ID and Secret key from IAM user creation page (if you still have it open), or alternatively from the CSV file that you’ve downloaded during the IAM user creation.
- For Bucket, enter
wp-workshop-<replace-me>(replace with some random string) and click Create as new bucket. - Click Test S3 upload to ensure the upload suceeds, then click Save all Settings. Note: if you’re encountering an error during the test (PutObject / 403), this is likely due to a global setting of S3 that affects any newer AWS accounts (see here for more information). If so, please go to the S3 settings, click Edit and disable the first two options.
Let’s add an image to the page now to see if our setup works.
- In the menu on the left again, click Pages > All pages,
- Hover over Sample page, then click Edit in the menu below.
- On the edit page, a info dialog may pop up, that you can close. After that, click the [+] icon on the top left and insert an image. Choose one from your local machine, or copy/paste any image URL from the web (such as this).
- Click Update to confirm the change.
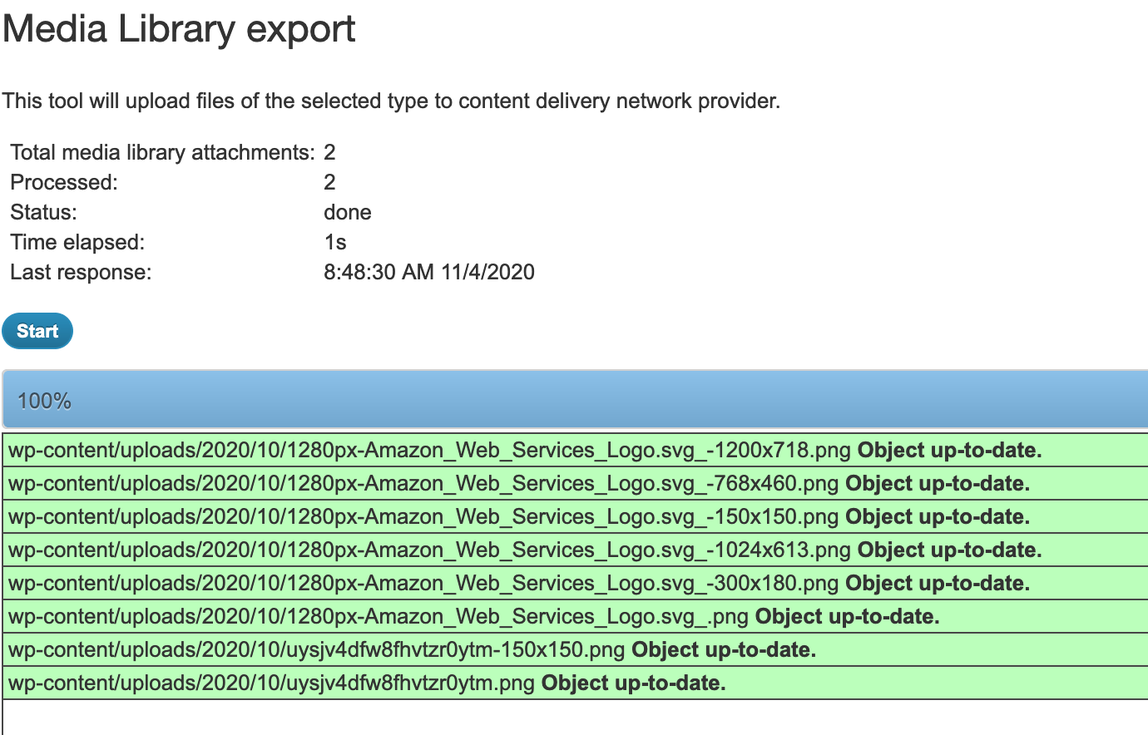
The image should show up on the page. Now let’s export the media files (such as the image above) to S3, so that it will be loaded from there for any visitors coming to our page.
- Click Performance > CDN the left menu and click export the media library.
- Click Start button to export file from EC2 to S3 bucket
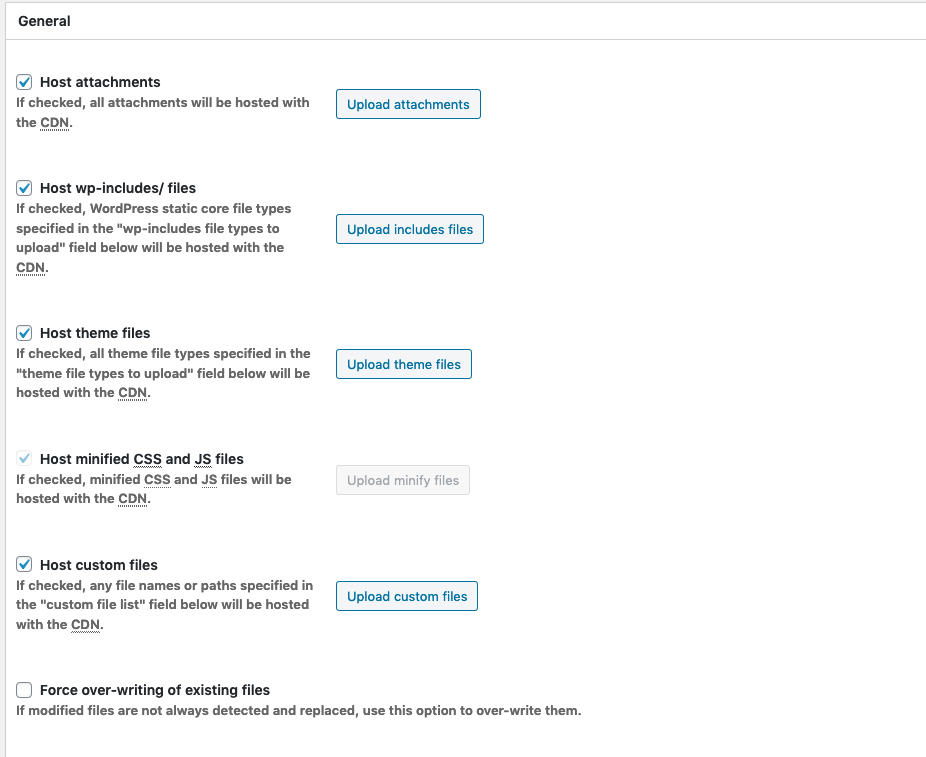
- Repeat this for the other assets, so for wp-includes, theme-files and custom-files.
Now, you can view your sample page by going to your <your ec2 domain>/index.php/sample-page/

If you open the S3 console, you will also find all the files now in the bucket.